Ayam Katsu
Chicken Katsu is a classic Japanese home-cooked dish served with tonkatsu sauce and a side of shredded cabbage salad. These tender and crispy panko-breaded cutlets are surprisingly easy to make, even on a busy weeknight! They also freeze well and make for a delicious meal-prep item.
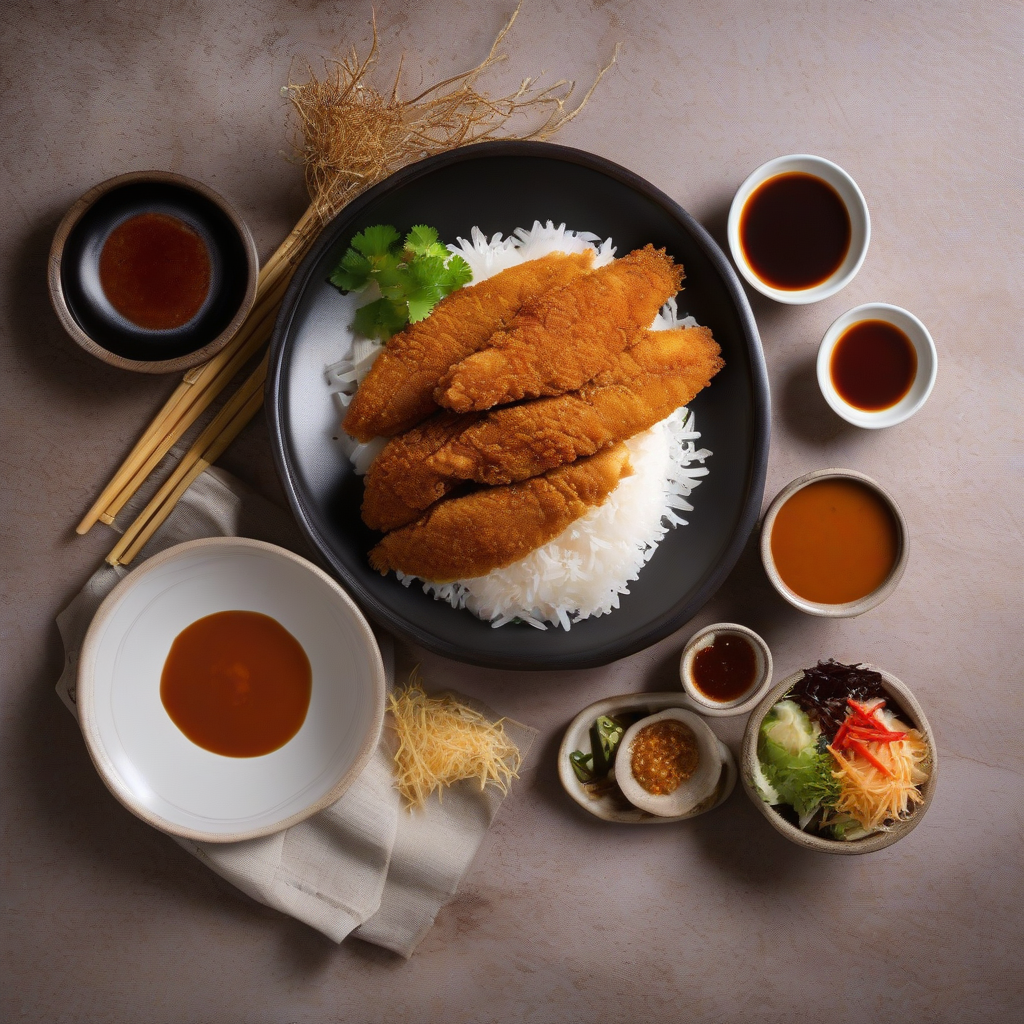 Foto: Just One Cookbook
Bahan-bahan
- 1 piece boneless, skinless chicken breast
- ½ tsp Diamond Crystal kosher salt
- ⅛ tsp freshly ground black pepper
- 3 cups neutral oil ((for deep-frying; enough for 1½ inches (3.8 cm) of oil in the pot))
- 3 Tbsp all-purpose flour (plain flour)
- 1 cup panko (Japanese breadcrumbs)
- 1 large egg (50 g w/o shell)
- ½ Tbsp neutral oil ((for the egg))
- tonkatsu sauce
- shredded green cabbage ((optional))
- Japanese Sesame Dressing ((optional))
- tomato ((optional))
Langkah-langkah
If you prefer not to deep-fry, see my recipe for Baked Chicken Katsu.
Gather all the ingredients.
Butterfly the chicken breast so the meat is thinner and cooks faster; read more about it in my blog post and watch how in my video. You can use one of two methods. You can split the breast horizontally from the side with a knife, stopping before you cut all the way through. Then, open it like a book. The two sides will mirror each other, resembling a butterfly. Alternatively, you could use the Japanese cutting technique Kannon biraki (観音開き) that I demonstrate here. With a sharp knife, score the top of 1 piece boneless, skinless chicken breast down the middle about halfway through the thickness of the breast; do not cut completely through.
Then, turn the knife parallel to the cutting board and slice from the center toward the left side (or the right side, if you‘re left-handed) to make it evenly thin. Stop before you cut all the way through, and open it like a book. Imagine we‘re creating a French door.
Turn the chicken 180 degrees and butterfly the second side, creating another “door.“
Cut the chicken in half down the center. Now, you have two pieces.
With a meat mallet or the back of the knife, pound the chicken pieces to an even thickness of about ¼–½ inch (6 mm–1.3 cm).
Season both sides with ½ tsp Diamond Crystal kosher salt and ⅛ tsp freshly ground black pepper.
Add 3 cups neutral oil to a medium-size, heavy-bottomed pot (I use a Staub 2.75 QT Dutch oven, 11 inches in diameter). Add enough so the oil is 1½ inches (3.8 cm) deep; dip a chopstick in it to measure. Start preheating it to 340ºF (170ºC) over medium-low heat (or low heat, if you need more time to bread the chicken). For the breading, prepare three bowls or trays: One with 3 Tbsp all-purpose flour (plain flour), one with 1 cup panko (Japanese breadcrumbs), and one with 1 large egg (50 g w/o shell).
Add ½ Tbsp neutral oil to the egg and whisk it together. Tip: By adding oil, the breading won’t detach from the chicken while deep-frying and this will help seal in the chicken's juices and flavor.
Dredge the chicken in flour and shake off the excess. Then, coat it with the egg mixture.
Finally, coat the chicken with panko and gently press it to adhere to the cutlet. Gently shake off any excess, then place the breaded cutlet onto a tray or plate. Repeat with the other piece.
If the oil isn't hot enough (340ºF or 170ºC), increase the heat to medium. Once it reached the right temperature, carefully add one breaded cutlet to the oil. I recommend frying one at a time, as adding too many will lower the oil temperature too fast. Keep the heat on medium and adjust as needed to maintain the right temperature. Nami's tip: If you are new to deep-frying, learn more tips on my How to Deep Fry Food page. I recommend using an instant-read thermometer to monitor the oil temperature.
Deep-fry for a total of 3 minutes, flipping it over at the halfway point. Tip: Do not overcrowd the pot. Your ingredients should take up no more than about half of the oil surface area. If you add too much food, the temperature will drop quickly and the chicken will absorb too much oil.
Cook until both sides are golden brown. Remove the chicken and let the oil drip off by holding the cutlet vertically over the pot for a few seconds. Then, transfer it to a wire rack or tray lined with paper towels. If possible, keep it on its side to drain excess oil.
Scoop up and discard any fried crumbs in the oil with a fine-mesh strainer. Then, cook the other cutlet. Tip: Throughout cooking, keep the oil clean of crumbs, which can burn and make the oil dark and dirty.
Cut the chicken katsu into 1-inch (2.5 cm) pieces and serve it with tonkatsu sauce. Typically, I serve it with a side of shredded green cabbage and my Japanese Sesame Dressing. I also add a few wedges of tomato for color.
Transfer the leftovers to an airtight container and store them in the refrigerator for up to 2 days or in the freezer for up to a month. To reheat, bake at 350ºF (180ºC) for 15–20 minutes if defrosted (in the refrigerator overnight) or for 30 minutes from frozen. Check that the inside is warm before serving.


Memuat komentar...